HTML 101
Overview
HTML (HyperText Markup Language) defines the meaning and content of a webpage. Other technologies help with the presentation and style of a page (CSS), and behaviour and functionality (JavaScript). We’ll cover these technologies later in the course.
HTML is a declarative language. There’s no logic. It’s just for declaring (or annotating) the different pieces of content on a webpage:
- This is an image
- That’s a paragraph
- Those are checkboxes
- Here’s a table
HTML uses tags to declare content. Most tags (not all) are a pair of opening and closing tags. Take the paragraph tag as an example: opening tag <p> and closing tag </p>. Here’s how to declare a paragraph in HTML:
<p>This is a paragraph</p>
The following figure shows the anatomy of an HTML tag (<p> in this case)
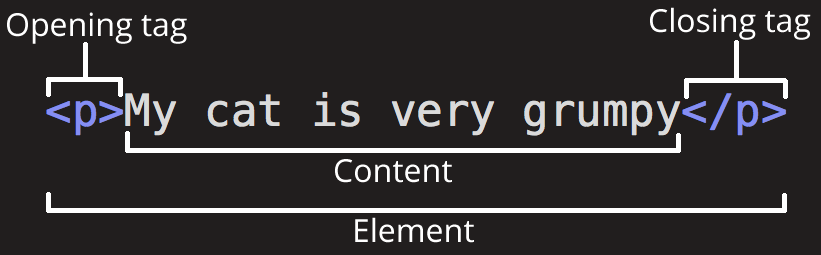
Image Credit: Mozilla
The name inside a tag is case-insensitive. So the above example could also be written as:
<P>This is a paragraph</P>
It’s convention to use lower-case letters for tag names. But if you decide otherwise, be consistent (either lower or uppercase letter, and not a combination of both).
There are some elements that don’t accept anything as content, so they don’t have a closing tag. They’re called self-closing or void elements. For example:
<img src="ucalgary.png" alt="ucalgary logo" />
Tags can be nested:
<p>This is <strong>important</strong></p>
In a nutshell, HTML provides meaning to our content. Take the following piece from the New York Times, for instance:
Alzheimer’s Prediction May Be Found in Writing Tests

IBM researchers trained artificial intelligence to pick up hints of changes in language ahead of the onset of neurological diseases.
Here’s how we can give it some meaning with HTML tags:
<article>
  <h1>Alzheimer’s Prediction May Be Found in Writing Tests</h1>
  <p>
    IBM researchers trained artificial intelligence to pick up hints of changes
    in language ahead of the onset of neurological diseases.
  </p>
</article>
Comments
Anything between <!-- and --> will be considered as a comment and will not show up on the page. Bundler tools, such as Webpack, are smart enough to remove comments to prepare your application for production. We will see this in action when we get to the React part of the course. However, removing comments is perhaps the simplest thing that tools like Webpack do.
<!--This is a comment-->
<!-- It could also
be in multiple
lines -->
HTML Attributes
HTML elements can accept multiple attributes. This is how we add an attribute to an HTML element:
<p attribute-name="attribute-value">...</p>
The following figure shows an attribute inside a <p> tag.

Image Credit: Mozilla
There are two kinds of attributes:
Global attributes are the ones that can be added to any element. Examples of Global attributes are the id and class attribute. These attributes become crucial when we get to the CSS and JavaScript part of the course.
There are also attributes that only apply to certain elements. For example, the href attribute applies to the <a> or Anchor element. You will find more information about HTML attributes here.
Images
We can define images and illustrations using the <img> void element.
<img src="PATH_TO_THE_IMAGE" alt="ALTERNATE_TEXT">
The alt attribute will show up if, for any reason, the browser cannot show the image. For instance, if the file path is wrong or there is a problem with the connection.
Note that for the src attribute, you can use both relative (if the file is on your servers) and absolute paths, as discussed here.
Links
Links are defined by the <a> tag. The href attribute is where the address (link) goes, and the target attribute specifies where the link opens.
<a href="https://www.youtube.com/watch?v=dQw4w9WgXcQ" target="_blank">Complete HTML Course</a>
_blank opens the link in a new tab.
Relative vs Absolute Links
When it comes to linking a file or a page on your website, there are usually two ways to do it:
Relative paths start from your current location, whereas Absolute paths are the full URL of a file.
<!-- using relative path -->
<!-- it goes one level up (../) and then inside the "about" folder and then "index.html -->
<a href="../about/index.html">About</a>

<!-- absolute path starting with the schema (https://) -->
<a href="https://mywebsite.com/about/index.html">About</a>
Inline vs Block Elements
A block-level element, like <div></div> takes up the full width of the page and has top and bottom margins. An inline element, like <span></span> or <strong></strong>, on the other hand, does not start on a new line and only takes up as much width as necessary.
Take the img tag as an example. The tag itself is an inline element, but with the help of a (rather) new element figure, we can have a block-level image. It also gives us the ability to add a caption.
<figure>
  <img src="PATH_TO_THE_IMAGE" alt="ALTERNATE_TEXT" />
  <figcaption>Figure Caption</figcaption>
</figure>
We may put inline elements inside other inline or block elements. But it’s not recommended to put block elements inside inline elements.
<!-- good -->
<p>
  I <i>DO</i> like banana pie!
</p>

<!-- bad -->
<span>
  <div>
    I <i>DO</i> like banana pie!
  </div>
</span>
You can find the full list of inline and block elements here.
Generic Elements
It’s a very good practice to find an appropriate HTML tag for your content. If you are writing a paragraph, it’s best to use the <p></p> element, for instance; and if the paragraph is part of an article, it’s best to put it inside the <article></article> tag. These so called semantic elements help your website to become more optimized when it comes to search engines.
However, in case you don’t come up with an appropriate elemenet, you can use the generic elements. For block-level elements, you can use the <div></div> element, and for inline elements, you can use the <span></span> element.
You can find a list of HTML semantic elements here.
Lists
There are mainly two types of lists:
- Unordered (defined with the
<ul>tag) - Ordered (defined with the
<ol>tag)
<!-- unordered list -->
<p>Shopping List</p>
<ul>
  <li>Milk</li>
  <li>Bread</li>
  <li>Soda</li>
</ul>
Result: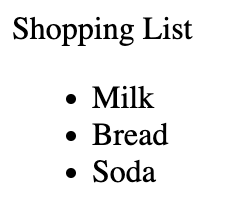
<!-- ordered list -->
<p>Steps to achieve happiness</p>
<ol>
  <li>Pick up your phone</li>
  <li>Unlock it</li>
  <li>Delete TikTok</li>
</ol>
<p>You're welcome!</p>
Result: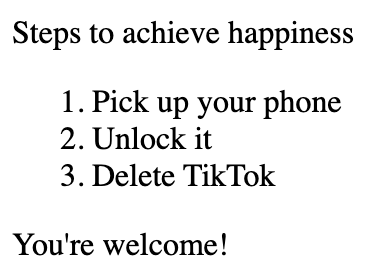
Forms
Forms are the way to gather data from the user. There is a wide range of available elements for HTML forms which we’ll cover at several points during the course. Here’s a simple example:
<form>
  <!-- label "for" attribute matches the "id" attribute of the input it refers to -->
  <!-- this makes it possible to click on the label and focus into the input element (the cursor moves to the input) -->
  <label for="fname">First name:</label>
  <input type="text" id="fname" name="fname" />
  <br /><br />
  <label for="lname">Last name:</label>
  <input type="text" id="lname" name="lname" />
  <br /><br />
  <!-- input of type "submit" creates a button which when clicked will submit the form to whatever address we specify as "action" inside the <form> tag (here we have none) -->
  <input type="submit" value="Submit">
</form>
Result: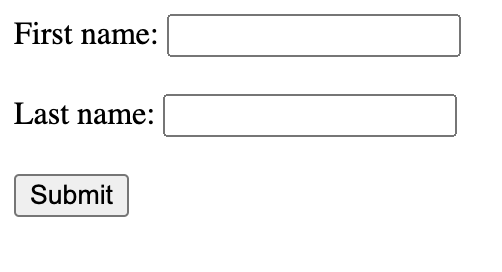
Tables
We use tables only when we want to show tabular data. That might seem like a given, but there was a time when people would use tables for designing the layout of a page. That is no longer the case. We design the layout using CSS which we will discuss later. Declaring a table in HTML is fairly easy:
<table border="1">
  <thead>
    <tr>
      <th>Name</th>
      <th>Grade</th>
    </tr>
  </thead>
  <tbody>
    <tr>
      <td>John</td>
      <td>A</td>
    </tr>
     <tr>
      <td>Jane</td>
      <td>A+</td>
    </tr>
     <tr>
      <td>Jordan</td>
      <td>A-</td>
    </tr>
  </tbody>
</table>
Result: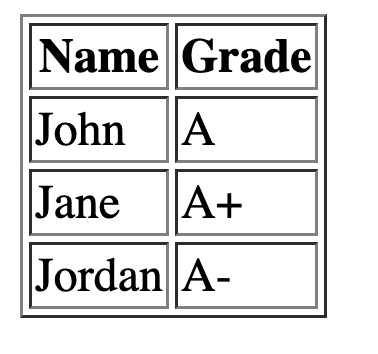
Anatomy of an HTML document
Here’s a simple anatomy of an HTML document. You can use it as a project starter.
<!DOCTYPE html>
<html lang="en-US">
  <head>
    <meta charset="utf-8">
    <meta name="viewport" content="width=device-width">
    <title>Page Title</title>
  </head>
  <body>
    <!-- content here -->
  </body>
</html>
<head>
In an HTML document, the <head></head> element is where you provide metadata about your page and link your external files such as CSS and JavaScript. The content of the <head></head> element does not show up on the page. The most important elements that go inside the head are:
<title>for declaring the title of the page. This title will show up on the tab of the browser<meta>for providing metadata about the page. These data are used by search engines<link>for linking external CSS files to your page<script>for linking JavaScript (internal or external) to the page
<meta charset="utf-8" />
Sets the character set of the document. UTF-8 supports almost all characters from the majority of languages (English, Spanish, Frensh, Chinese, …).
<meta name="viewport" content="width=device-width" />
This tag makes sure different screen sizes are not shrinking the page to fit the content. It sets the width of the content to the width of the viewport available on the device. This is important for making sure that the page is responsive and shows up ok in all screen sizes.
<body></body>
All the content that appears on a page goes here.
DOM
A webpage is just a hierarchy of HTML tags, all within <html></html>. This hierarchy makes a tree that is called Document Object Model or DOM. DOM becomes important in writing CSS and JavaScript. The way we structure our content using HTML tags can make it more or less efficient when it comes to the performance of executing CSS or JavaScript code. They also have a direct impact on how good our website will appear on search engines, something known as Search Engine Optimization or SEO.
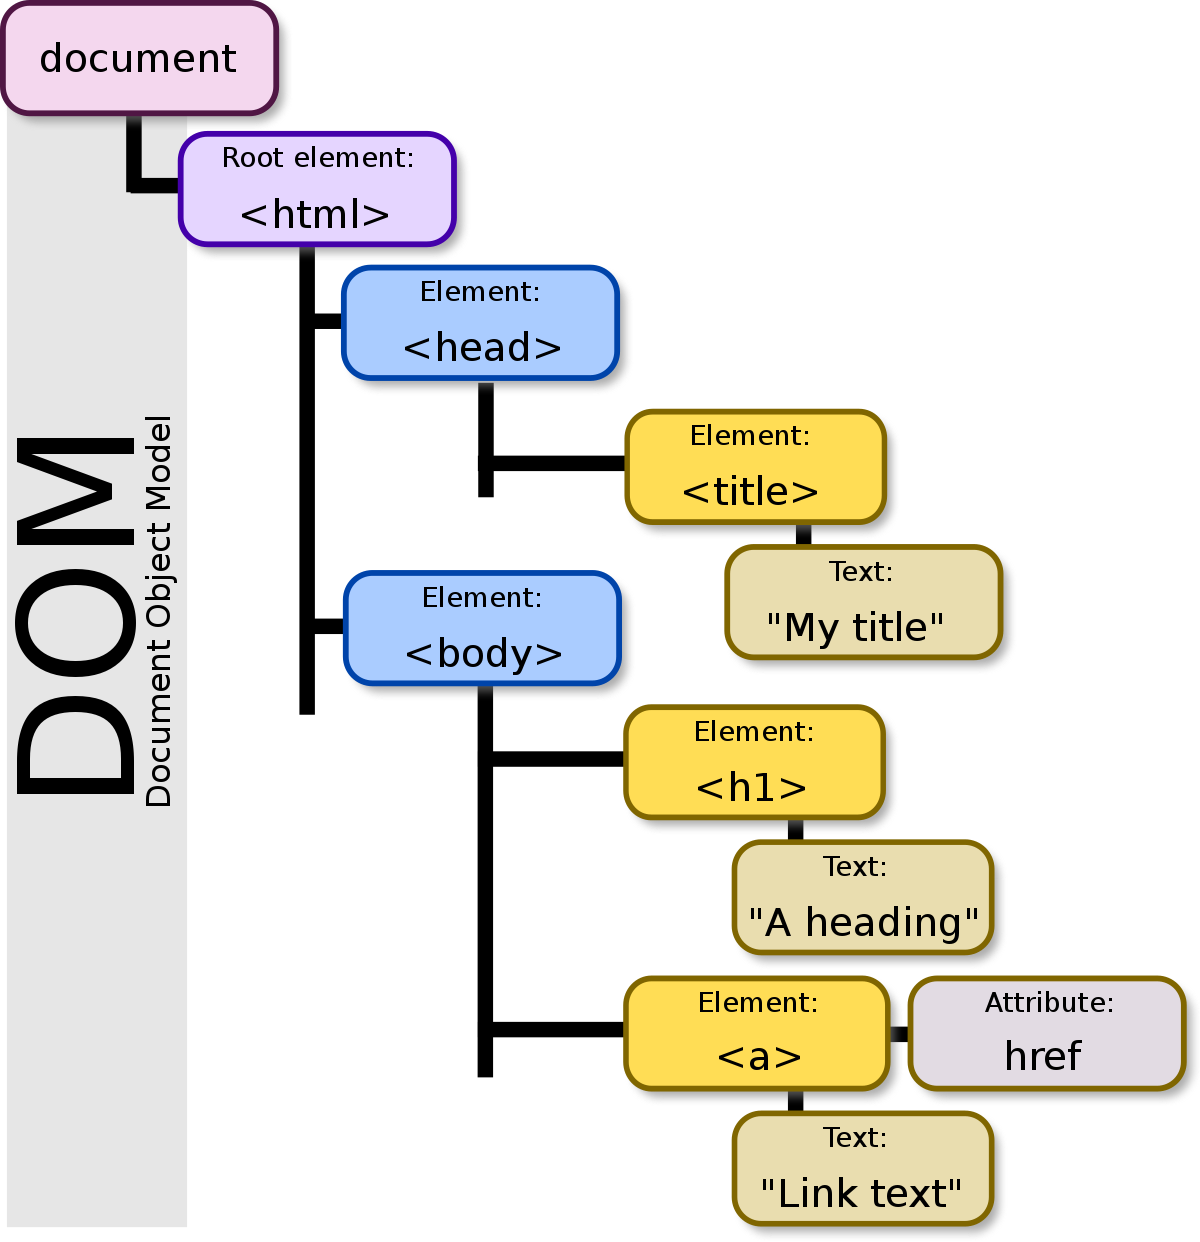
Image Credit: Wikipedia
Browser Developer Tools
All major browsers provide developer tools that help you test and debug your application. You can easily change the content, style, and even behaviour of a webpage using the tool. We’ll explore the capabilities in the class. You can open the Developer Console on Google Chrome with Option + ⌘ + J (on macOS), or Shift + CTRL + J (on Windows/Linux).
Sample HTML Page
Here’s an HTML page including the tags mentioned above (and some more):
<!DOCTYPE html>
<html lang="en-US">
<head>
<meta charset="utf-8">
<meta name="viewport" content="width=device-width">
<!-- page description that will appear on search engines as link summary -->
<meta name="description" content="Student grades and complain form">
<title>UCalgary ENSF 381 Grades</title>
</head>
<body>
<h1>
UCalgary ENSF 381 Grades
</h1>
<p>
<!-- this image needs to be available in the same directory as this document -->
<img src="ucalgary-logo.png" width="300" alt="ucalgary logo">
</p>
<div>
<table border="1">
<!-- "thead" wraps the headers -->
<thead>
<tr>
<!-- each "th" is a column header -->
<th><strong>First Name</strong></th>
<th><strong>Last Name</strong></th>
<th><strong>Section</strong></th>
<th><strong>Grade</strong></th>
</tr>
</thead>
<tbody>
<!-- each "tr" wraps a row -->
<tr>
<!-- each "td" is a column -->
<td>Jean-Luc</td>
<td>Picard</td>
<td>1</td>
<td>A</td>
</tr>
<tr>
<td>Tasha</td>
<td>Yar</td>
<td>2</td>
<td>A</td>
</tr>
<tr>
<td>William</td>
<td>Riker</td>
<td>1</td>
<td>B+</td>
</tr>
<tr>
<td>Data</td>
<td>-</td>
<td>2</td>
<td>A+</td>
</tr>
</tbody>
</table>
</div>
<h3>Notes</h3>
<ul>
<li>Last day for complaining about your grade is yesterday</li>
<li>Feel free to complain but I'm not gonna read them</li>
</ul>
<form>
<!-- "input" and "label" are inline elements and -->
<!-- we can wrap them in a block element like "p" to break the line -->
<p>
<label for="fname">First Name</label>
<input type="text" id="fname" placeholder="Enter First Name">
<!-- is the non-breaking space character -->
<label for="lname">Last Name</label>
<input type="text" id="lname" placeholder="Enter Last Name">
<label for="starship">Starship</label>
<!-- select creates a dropdown -->
<select name="starship" id="starship">
<option value="NCC-1701-D">USS Enterprise (NCC-1701-D)</option>
<option value="NCC-1701-C">USS Enterprise (NCC-1701-C)</option>
</select>
</p>
<p>
<!-- textarea creates a multi-line input -->
<!-- its size is specified with "cols" and "rows" attributes -->
<textarea id="complain" cols="30" rows="10" placeholder="Your Complain Here"></textarea>
</p>
<p>
<!-- checked attribute at the end makes the box checked -->
<input type="checkbox" checked>I agree to the fact that my
complain means nothing to you
</p>
<p>
<input type="submit" value="Submit Complain to Nowhere">
</p>
</form>
</body>
</html>
Result:
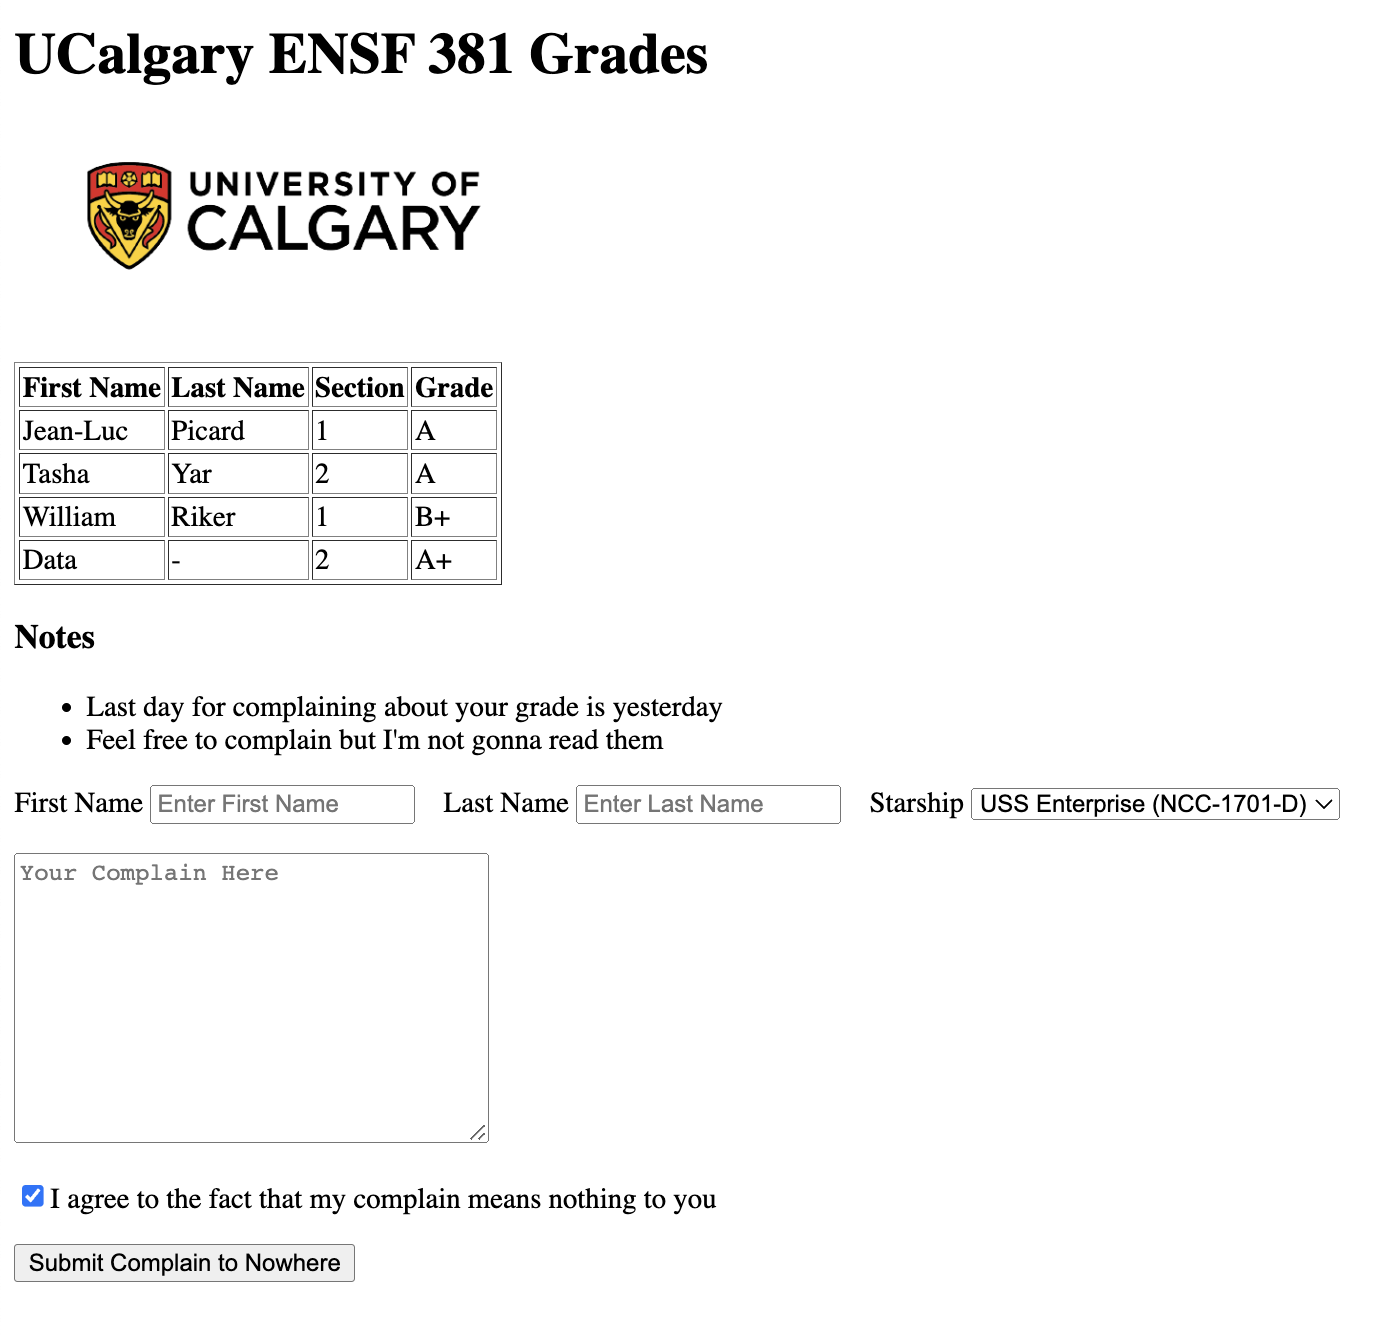
To test above code, save it as index.html and open it with a browser.